What To Do
1. Send data to a computer and display results with code you've written.
2. Document progress on your final project.
2. Find a pattern to cast and a ventilated space for class on Tuesday.
What I Did
For this assignment, I made lots of progress on my final project, the automatic fish feeder. I created a web interface completely from scratch using Google Firebase, which I've used before for assignment 09: Networking / IoT. This time I wanted to take it further, and I definitely did by creating a web interface for controling the fish feeder. I also added in some quality-of-life improvements, like status LEDs and push notifications, both of which I talk about later.
At first, for my final project, I wanted to control the feeder using Arduino IoT Cloud. But, I realized that it was a bit too limited in functionality for what I wanted. So, I started to make a web interface that's connected to this website, sharing CSS and Bootstrap configurations. I want my final to have it's own website, but for now, I think it turned out pretty well using my website's CSS configs. The final demo that I have completed for this assignment can be seen below.
To view the fish feeder interface page, click here. That specific demo page doesn't actually control anything (I removed the Firebase info for security reasons) but the real interface page does.
I talk about my whole process of building that web interface and more in the following sections.
NTP Client Setup
The main reason I switched over to using Firebase from using Arduino IoT is because I wanted to get a working clock using an NTP client. This probably also works using the Arduino IoT Cloud, but I found it to be much easier to do using Firebase and creating my own web interface.
The basis of my interface is built on an interface previous student Michelle made last year. She used an NTP client to recieve a time output, which she then turned into a variable to use as a current time reference. Then, she created a textbox on her interface to input a set time at which her alarm clock would ring. This is exactly what I wanted, so I followed what she did. Of course, I changed many things so it isn't an exact copy.
The first change I made was actually to use a completely different NTP server. I found that Michelle's method was too confusing for me, so I followed this guide by Random Nerd Tutorials. It was super easy to set up and integrate with my previous skethces. The guide itself is very comprehensive and explains every line of code, which is great. The best part is that I didn't even have to include any other libraries other than the WiFi.h library, which we already have been using, and Arduino's time.h library.
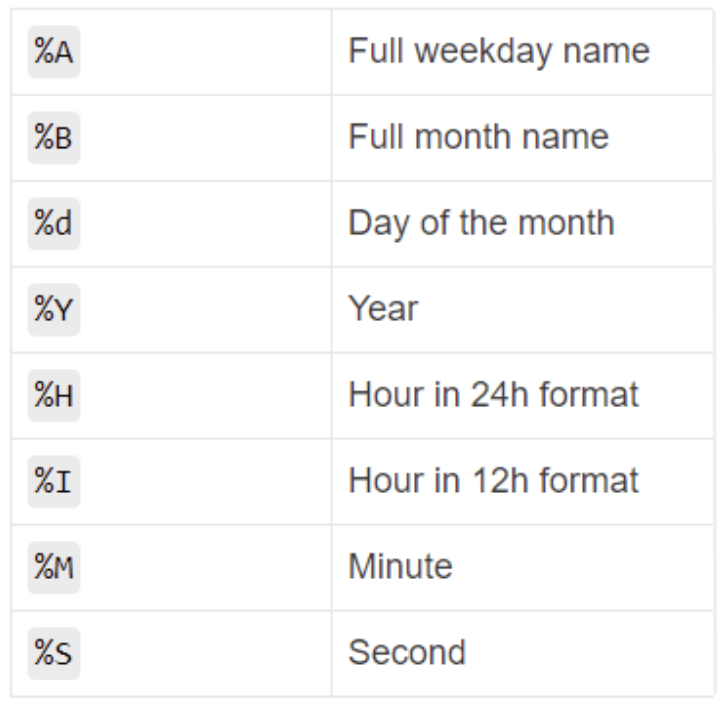
The way that the time data is recieved from the NTP server itself is by calling the strftime function. This function is used to format time recieved from the NTP server as strings that we can actually use. So, at the bottom of the code on the first tab, the Serial.print lines are printing various strftime specifiers, each outputting a different time format. The strftime specifiers used in the first tab and their meanins are in the chart below. A list of all the strftime specifiers can be found here.
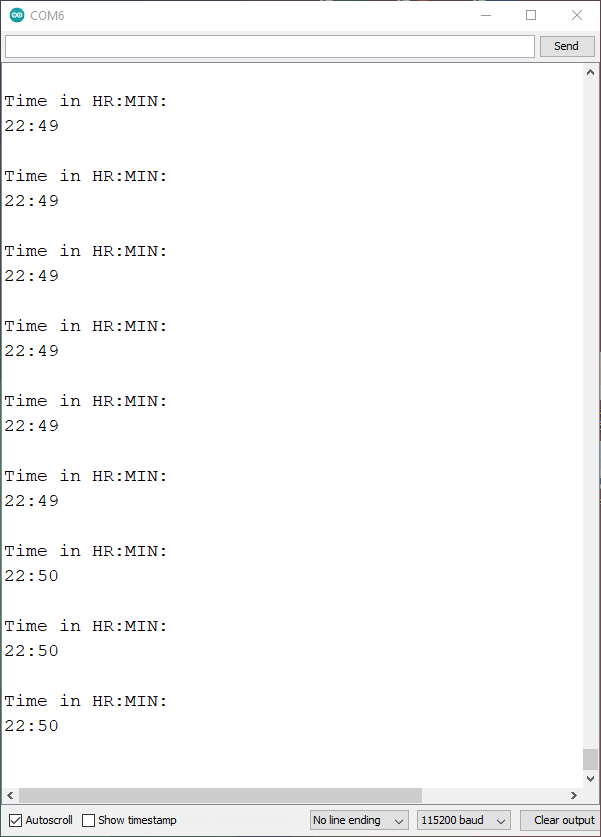
The only difference between the first and seconds tabs is that in the second tab, I got rid of the extra strftime specifiers that I wasn't using and replaced them with the one function I need: %R for formatting time in HR:MIN format. I then created a variabled called currentTime, which I use for all of the codes from here on out. This way, I can compare the time set in the text box to the actual time recieved from the NTP server and execute a function.
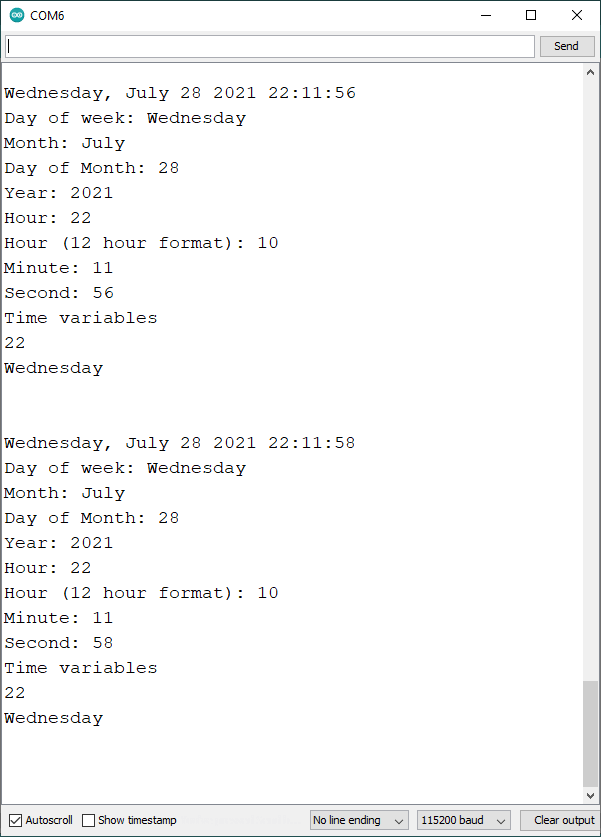
The first serial monitor image below shows the serial monitor output from the code in the first tab. The second image shows the output from the code in the second tab.
This is really all I needed from the NTP server, as I wanted to have some way for the feeder to activate at a set time daily. The next steps were creating the interface with multiple functions, hooking up to firebase, and setting up push notifications. I talk about each of them below.
Web Interface and Firebase
My basic interface is shown in the image below. It's almost exactly the same as Michelle's alarm web interface, but that's only because I used the same textbox and "set time" function as she did. I linked the basic interface demo and HTML files below. I hid my Firebase info in the HTML file for security reaons, but if you want to copy my example, all you need to do is use your Firebase info.
To view a demo of the basic interface page, click here.
To view the HTML, including JavaScript button and text box functions, of the basic interface page, click here.

Now that I had a basic interface, I wanted to expand the functions of the interface and incorporate my website's CSS and Bootstrap theming to make it look good. Firstly, I added my web interface HTML page to this website's folder and referenced the Bootstrap, CSS, and JS files on the web interface. This significantly made it look better (obviously).
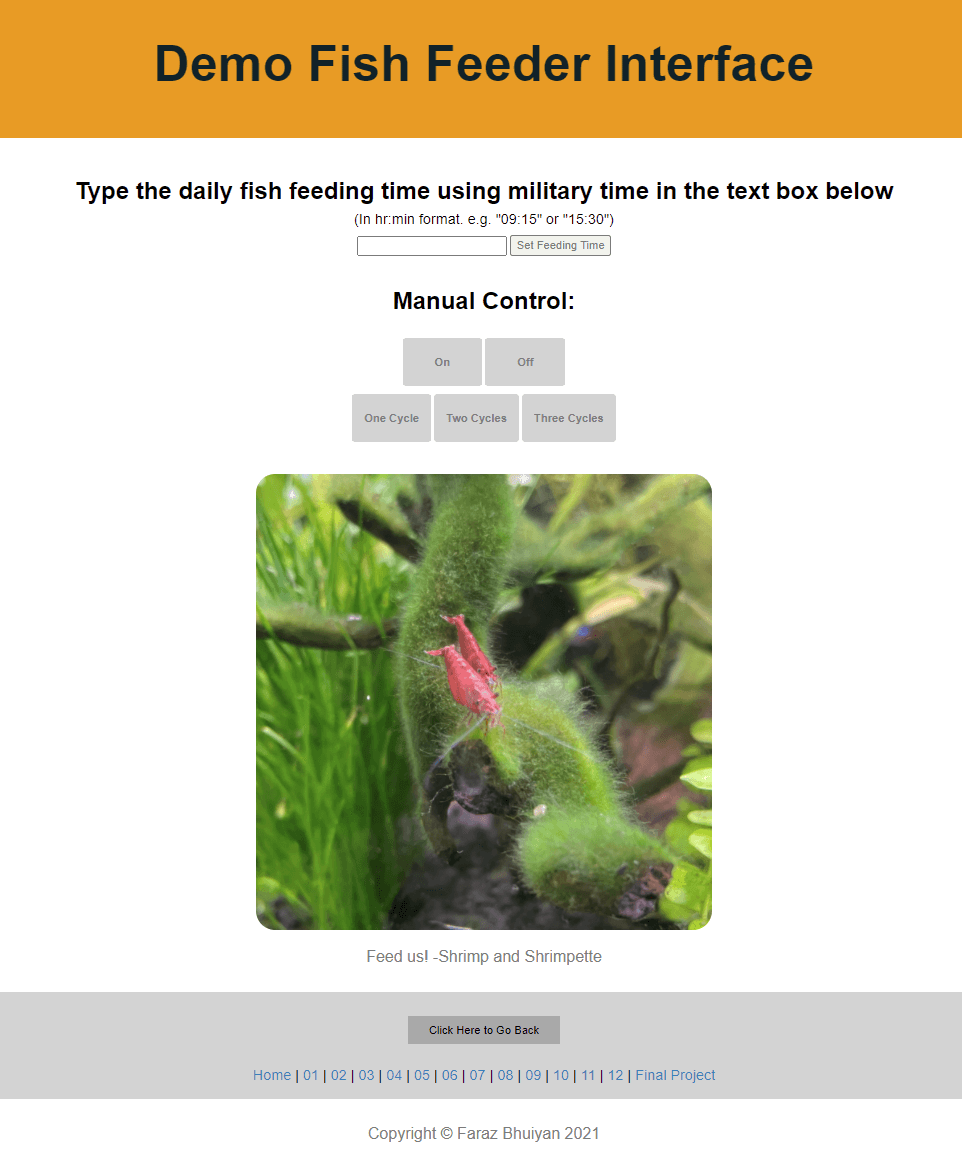
Below is an image of what the basic interface looks like with CSS. I changed up the wording a bit, but the biggest change is the font. It looks way better with the font I'm using on this website (I honestly don't know what it's called). I don't link the HTML or the page itself because it's bascially the same as the first one with the CSS files included.

In the Arduino code embded below, I deleted my actual Firebase info and WiFi info for security reasons. For the code to actually run, you need to put your Firebase info and WiFi info when I left mine blank. I also split up my coding addition into three tabs, just so it's easier to follow what I'm doing.
The first tab in the embed is for the interface example shown above, just a text box with time setting.
The second tab adds in another Firebase string, which is for writing and detecting the feeder status. This allowed me to add in a manual "ON" and "OFF" button.
The third tab adds three cycles that I can manually activate to feed once, twice, or three times in one feeding. These cycles use the Firebase string that I added in the second tab.
One thing to note is that I connected this portfolio website to the interface website in this example, so the navbar is shown, otherwise that wouldn't actually be on the real interface. I also added a picture of two red shrimp from my tank: Shrimp and Shrimpette.
So the way that the timer actually works is that you set a time in the web interface using military time because I am using a military time output strftime specifiers so I recieve the time in military time from the NTP server. Then, I set that military time I recieved as the currentTime. So, when you type a number into the interface, the variable for which is feedingTimeString, it is compared to the currentTime and executes if the two equal eachother. This is seen in the first if() statement on all tabs.
The video embeded below shows how to set the time and the real-time database updating on Firebase. The code for the interface in the video is on the first tab in the Arduino embed.
In the second tab, I added in a new string so I can manually turn on and off the feeder. The new string is called feederStatusString, and the reason I need it is because the first one is being used for a time value (whatever time I have set for daily feeding). The image below shows what the two values in my Firebase databse look like.

These values in Firebase change depending on the input from the web interface. For the buttons, I created two more if() statements, one for "ON" and one for "OFF", and have feederStatusString being compared to them. So, if I press "On" on the web interface, it updates on Firebase first, and then that data is recieved by the Huzzah (my ESP32 board) either as "ON" or "OFF." Since the feederStatusString is constantly being compared in the two manual mode if() statements, when the feederStatusString is set to either "ON" or "OFF," the code within whichever if() statement was set to "ON" or "OFF" activates.
The third tab additions was basically a duplication of the second tabs additions three times. I added in a one cycle, two cycles, and three cycles manual buttons on the interface, just to give myself more control over how much I want to feed the fish. It works the same way as the On and Off buttons work, as I described above.
With the addition of the manual status control and cycles, this now meant that my website had 3 total functions: setting daily feed times, manual feeder status control, and manual feeding cycle control.
To view a demo of the triple-function interface page, click here.
To view the HTML, including JavaScript button and text box functions, of the triple-function interface page, click here.
To make the buttons look nice in the interface, I followed this guide by David Cochran.
And that was basically it for adding key functions to the interface. I added everything I wanted during this assignment, like the type setting function and manual control functions. In the future, I want to add a bit more like a box for "previous time set" or "current time set," just so I know what time I had set last time because as of right now, after you leave the interface page, your set time erases.
One quality-of-life improvement I made was configuring my Huzzah board to send push notifications using IFTTT. I talk about this in the next section.
Sending Push Notification
Because my final is an automatic feeder, I wanted to find a way for the feeder to notify me that it has run. I was tossing a few ideas around, like sending data to a Google Sheet or turning on an LED when the feeding was done for the day. But, I figured that the best idea was having push notifcations for every time the feeder ran.
I searched for different ways of sending push notifications from an ESP32 (my Huzzah) to my phone. I landed on IFTTT, which stands for If This Then That. IFTTT is a very popular IoT app that allows you to connect all types of internet-based devices to eachother, so it was perfect for sending notfications from my Huzzah to my phone. On IFTTT you make these things called "Applets," which are like "mini, active apps you can create — things your apps can't do on their own," as stated on the IFTTT website. Essentially, in this Applet, you set an "if" and a "then" event. So, if this event occurs, then that event triggers. And, the best thing is that I can make three of these Applets completely free.
For setting up an IFTTT Applet, I used the Arduino guide embeded on the right. It was very useful for setting up the whole thing, so I won't talk much about the process.
The guide itself shows you how to set up the Applet and hook it up to Google Drive. Instead of hooking it up to my Google Drive, I just have it set to send a notification to the IFTTT app on my phone when the event triggers. To connect IFTTT to the Huzzah, I found this tutorial made by Siytek. It was incredibly helpful, and very thorough as well. For connecting IFTT to the Huzzah using the method above, I neede to download the "AnotherIFTTTWebhook" library made by Siytek, the GitHub link for which is linked here. Siytek's guide not only shows how to integrate IFTTT with the Arduino code editor but also shows how to call the function to trigger the "if" event.
Both these guides were super helpful, and I definitely recommend using them if you plan on using IFTTT with Arduino.
I'll now talk about how I set up my Applet for the automatic fish feeder push notifications. Like I said, it's a very simple and intuitive process, so there aren't really many steps.
To the right are images of my "if" and "then" events.
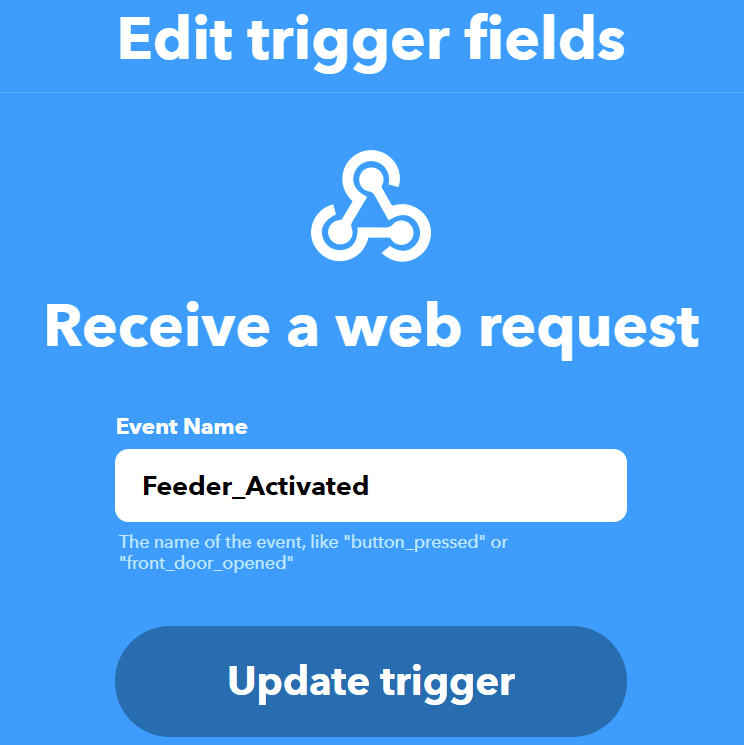
The "if" event basically says, "if IFTTT recieves a web request to trigger an event," which, in terms of my situation, means "if Arduino calls IFTTT to trigger the Feeder_Activated event." The name I gave my event is "Feeder_Activated."
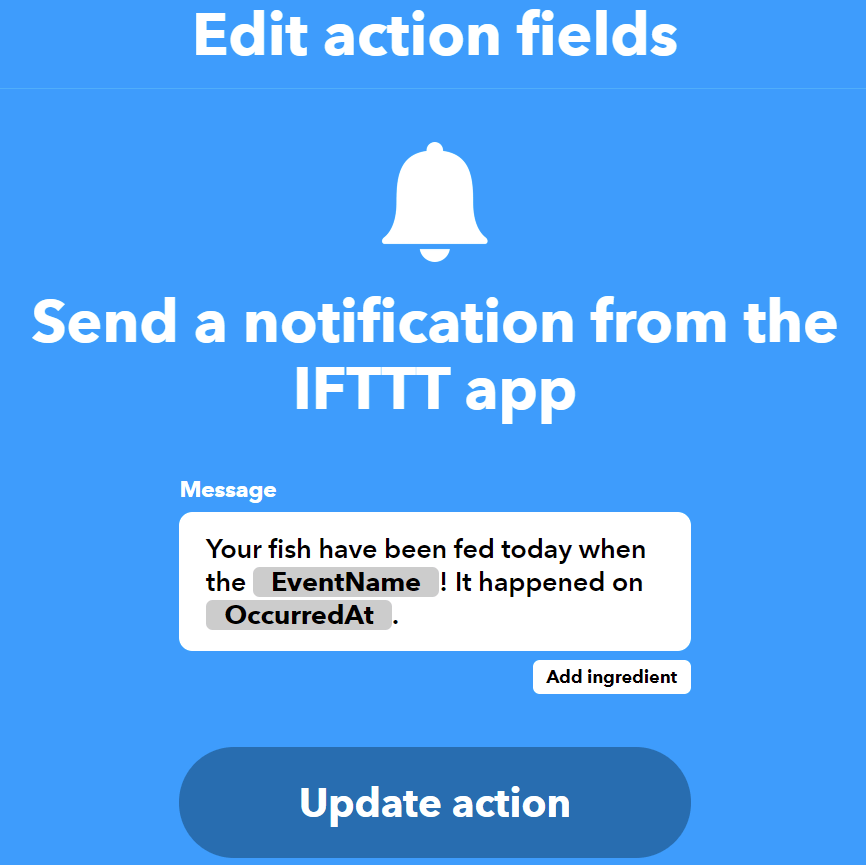
The "then" event basically says, "push a notification from the IFTTT app saying Feeder_Activated and exactly when it occured." Below is what the notification on my phone looks like.

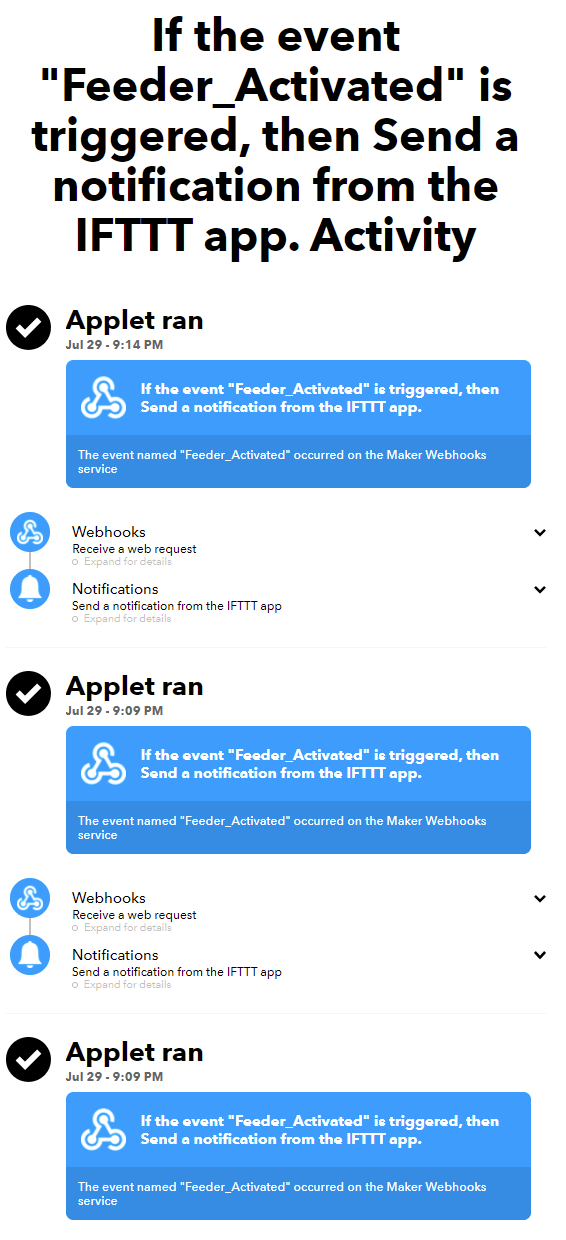
IFTTT also keeps a log of every time the event is triggered, so you can see exactly when the event happened. This is super helpful for my final project because it allows me to know if the feeder is actually being activated. It's like a serial monitor but in real life.
Now, I'll talk about my final code for this assignment.
There are three main changes I made from the last iteration of the code.
One main change was adding in the AnotherIFTTTWebhook.h library to the sketch and calling it globally. This is the library that contains the event calling function and more.
Another change was defining the IFTTT_Key and IFTTT_Event globally. The key is my secret IFTTT key given on the IFTTT website, and the IFTTT event I set is called "Feeder_Activated."
The last main change was creating a new void() function below the setup and loop functions with the name sendIFTTTData(), which can be called to for triggering the event. I did this so I can trigger the event from different web interface inputs, like manual status changes, manual cycles, and daily cycles.
Finally, all that's left to do is call the function somewhere in the code. Inside the first if() statement, the one for the automatic daily cycle, I called the function sendIFTTTData(), which exectes the new sendIFTTTData() void function I created.
And that's it! Now, it works perfectly. The video below shows a demo of the interface and push notification. You'll notice that the notification sends very quickly after the fish feeder has been activated. I believe they advertize a 10 second max event trigger time for free users, which includes me.
Also, on the app, it tracks every single notification and time in one log. This is really convenient if I'm ever away and need to check if the fish have been regularly, which they should. Like I said, it's a good quality-of-life improvement. An image of the notification log on the IFTTT app is shown below. It shows the number of events that occured and what time events triggered. In my case, I only had one event, "Feeder_Activated," so I only recieved notifcations for that event.
The final interface demo page is here (this is the same demo link as the very first demo link on this page). I also used the same HTML web interface page as I did in the last example, which can be found by clicking here.
All in all, this assignment was incredibly helpful for my final project, because I wass basically able to complete the whole web interface with a working push notification system. I'm really glad that the push notifications work, even though they don't add that much to the feeder itself, it a nice quality-of-life improvement to have.
What I Learned
» How to create a working web interface connected to Firebase
» How to recieve data from multiple Firebase datapoints
» How to using an NTP client
» How to convert NTP client data into usable data
» How to create Applets on IFTTT
» How to connect IFTTT to Arduino
» How to send push notifications from Arudino to IFTTT