What To Do
1. Watch a Fusion 360 tutorial.
2a. Model either two kit components or simple household objects.
2b. Create an assembly of multiple components.
What I Did
This assignment wasn't nearly as overwhelming as the first one was, mainly because I have a good bit of prior experience using CAD software. In school, I learned how to use Autodesk Inventor, which is basically the same as Fusion 360, the software we will be using during this course. I also learned how to use Tinkercad, a free software also made by Autodesk.
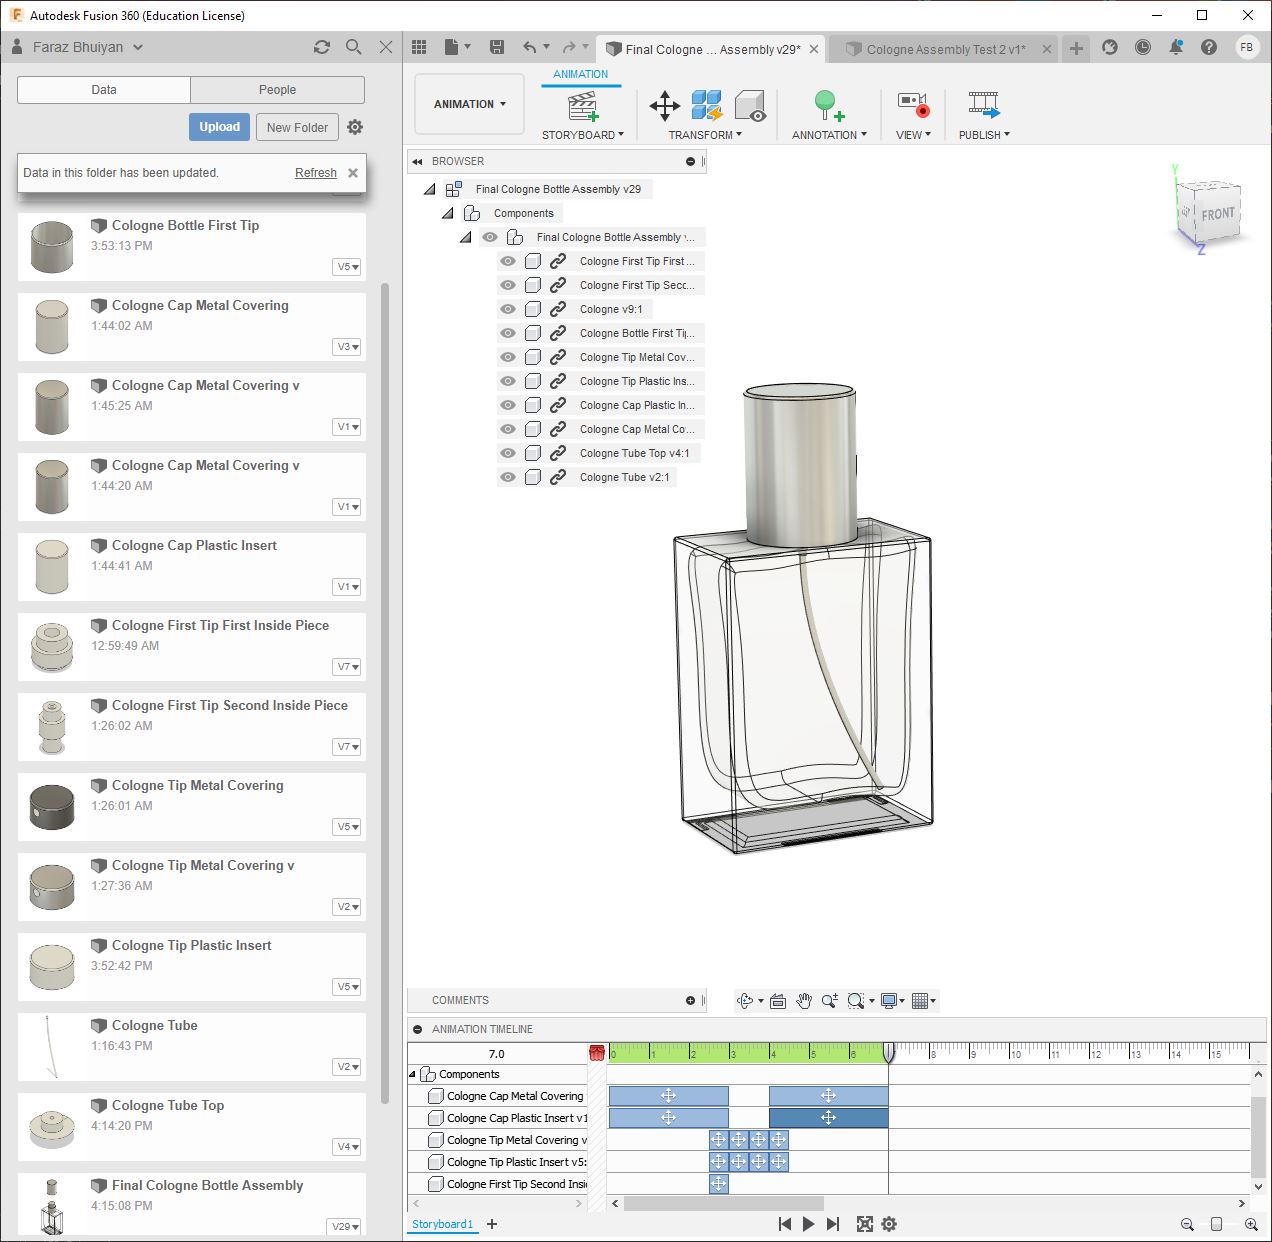
My idea for what to model on Fusion 360 was to make something had moving parts. I didn't want to make anything too complex, so I decided to make a small cologne bottle. At first, I thought it would be super easy, because I was just planning on making the glass bottle, the spray mechanism as one piece, and the cap. However, I decided that I wanted to show the inner-workings of the spray mechanism as well. This proved to be a huge undertaking, as I got stumped at many different steps. I embeded my final cologne bottle assembly below.
For the model viewer below, I recommend clicking "Model Browser" to view all the individual parts and clicking "Explode Model" to view the hidden parts. Also, my model is downloadable by clicking the blue "Open in Fusion 360" button at the bottom right-hand side of the model viewer. Alternatively, you can click here to view the model through the Fusion 360 My Hub website.
Something to note is that I only modeled what was visible and measurable. For example, I didn't model the actual spring that is below the tip. However, the model the model functions as if there was a spring.
One thing that I had to learn was how to properly use the joint function. In Inventor, the way to combine different parts is by constraining a piece's different axes so it doesn't move or moves only in a certain way. So on Inventor, to create a rigid joint, all 6 axes would need to be constrained. However, on Fusion 360, a joint restrains all axes first. Then, certain axes need to be individually un-constrained to create certain functions, like a rotating door knob. This is the complete opposite to the constraining methods of Inventor.
I also tried to make the modeled components as color-accurate as possible, although it was a bit challenging. For one, the glass itself is really difficult to see in the model viewer. I tried changing the color of the glass, but it didn't really make a difference. Also, the plastic pieces on the inside aren't very color-accurate. For example, the plastic pieces in real life are quite opaque but still somewhat transparent. On the model, they are completely solid. So, I added direct-comparison pictures further below to view the actual cologne bottle and my design side-by-side.
To show the moving parts of my model, I created an animation inside of Fusion 360. The animation browser is very intuitive. I just set the home view as the first point-of-reference, then scrubbed to 7 seconds in the timeline, and finally set the last view on the other side of the bottle as the final view. That's how I got the "camera" to essentially orbit around the front of the bottle. I did the same thing for the motion as well. I made the starting position of the spray nozzle and the cap to be the normal position of the cologne bottle. Then, I made the cap move up with a duration 3 seconds and later made the cap come down for the same time duration. The nozzle spray has a total period time of 1 seconds, so it goes down and up in half of a second each.

Model Comparison
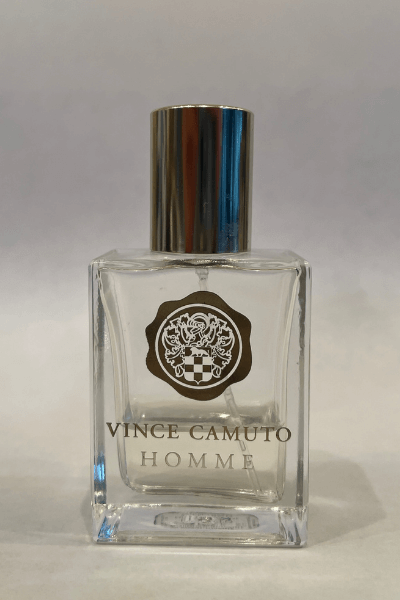
Below, I put pictures of the actual cologne bottle and my model. The order goes actual, model, and rendered image. For every set, I wrote a brief summary of my findings and what I found interesting in each set. This was a really fun side project, as I was able to compare the actual to the model to the final rendered model to see the similarities and differences. Also, all of the images below are taken in perspective view, which more realistically depicts width, height, and depth than orthographic view does.
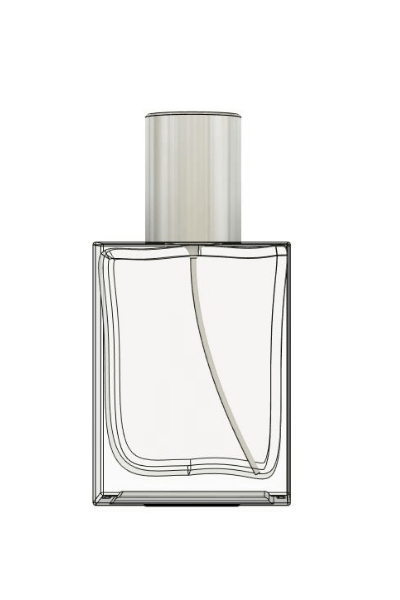
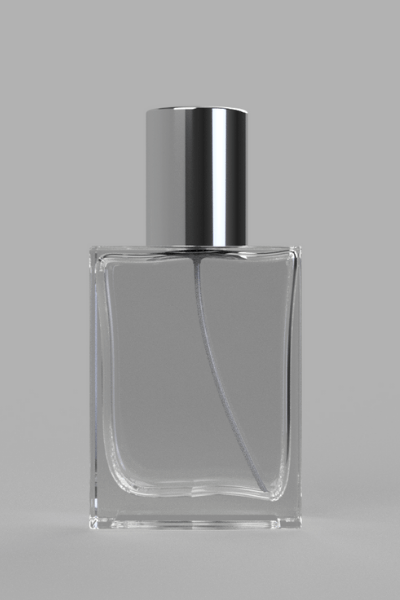
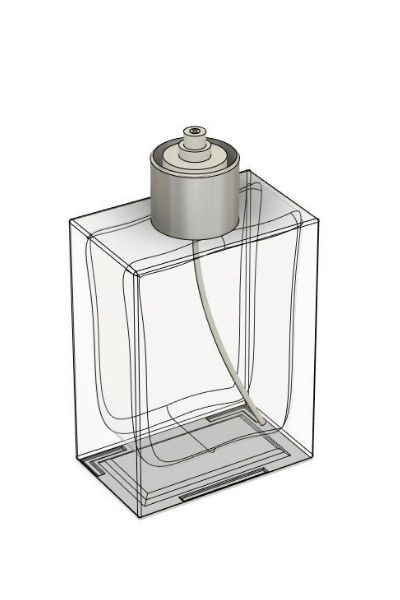
The first set of pictures showcases the front view of the bottle emphasizes the interior of the bottle. There is a difference in glass color between the actual and rendered bottles because the actual glass has a yellowish tint, while the rendered has no tint.
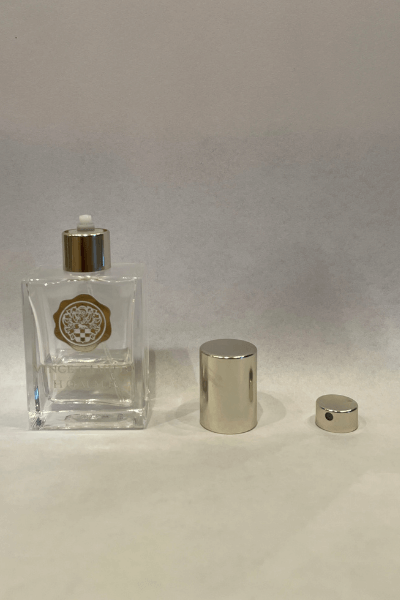
Actual
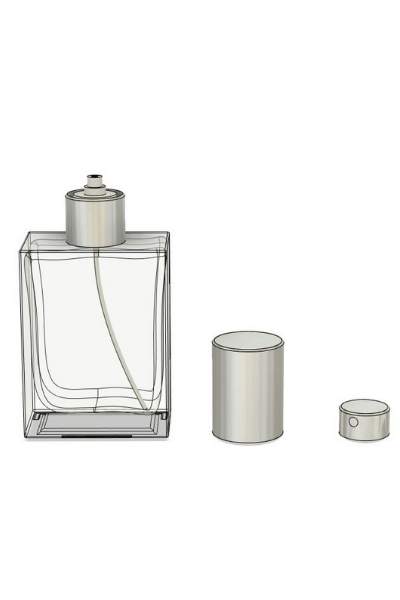
Modeled
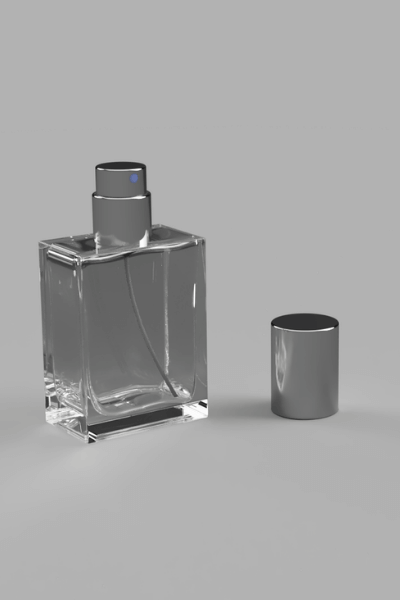
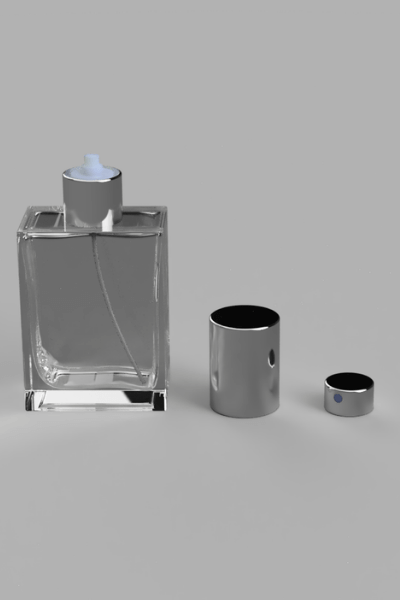
Rendered
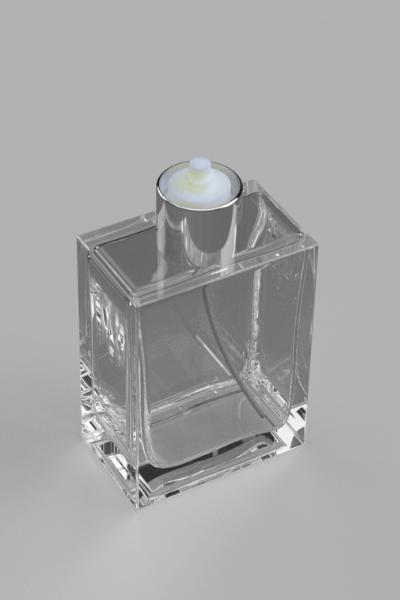
The second set showcases the inside of the spray mechanism. The inside plastic part on the rendered is nearly identical to the real one, in terms of color and shadows. What's really cool is that the curvy reflection on the aluminum cylinder part is seen in both the actual and the rendered bottle.

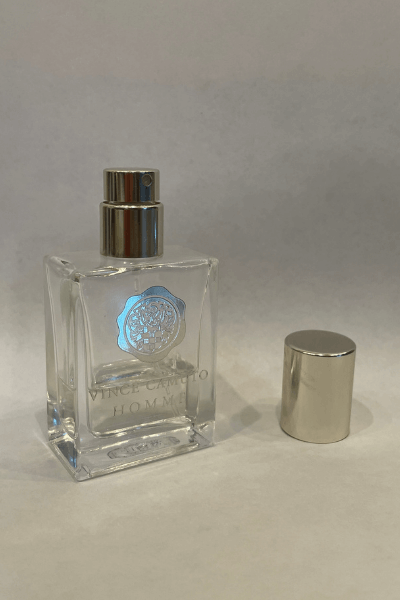
The reflections produced of the rendered model in the third set is very accurate to that of the actual bottle. The same reflection can be seen on the left side of the metal cap on both actual and rendered bottles.
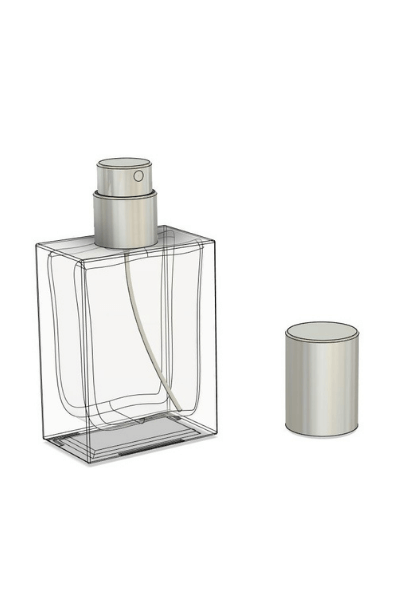
Similar to the rendered bottle in the previous set of images, the rendered bottle in the fourth set also has very accurate reflections. On the actual image, the metal cap has a reflection on either side of the cap, which is seen almost indentically on the rendered image.
Modeling Steps
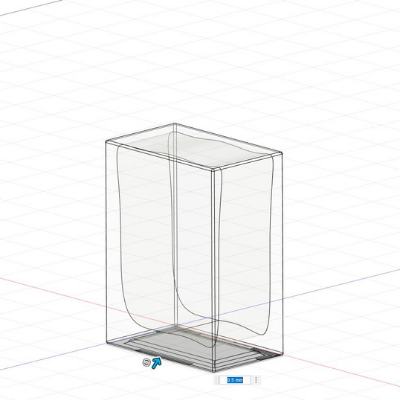
Because there are 10 pieces to my cologne bottle that are all made with the same or very similar methods, I'll just go over how I made the main glass bottle part. The biggest difference between the glass body and the other parts is that the body is rectangular and the other parts are circular. Otherwise, I used the same methods to make all parts.
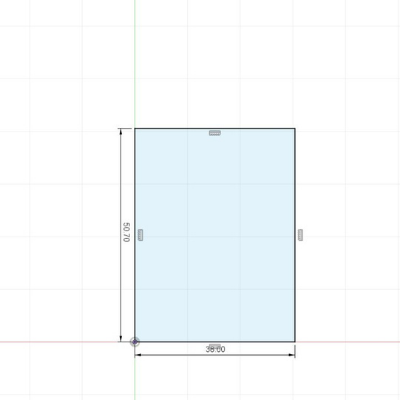
1. I first made a rectangular sketch according to the measurements I took of the body. For other parts, I either made a circle or part of a circle.
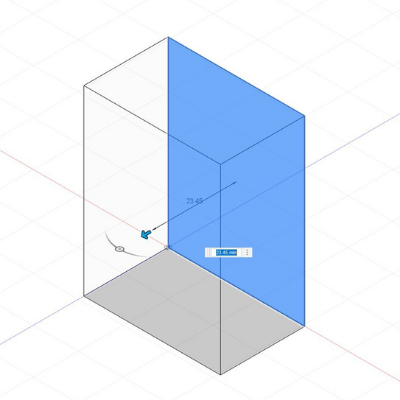
2. I then extruded the sketch, again to the measurements of the body. The extrusion is a "New Body" because it's the only body that I've made so far.
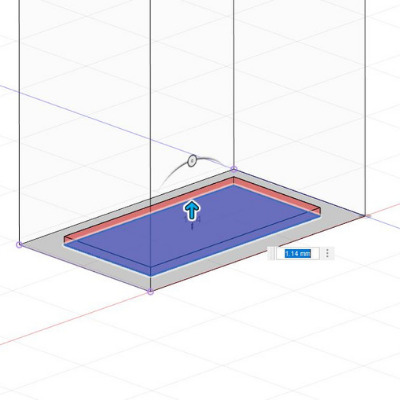
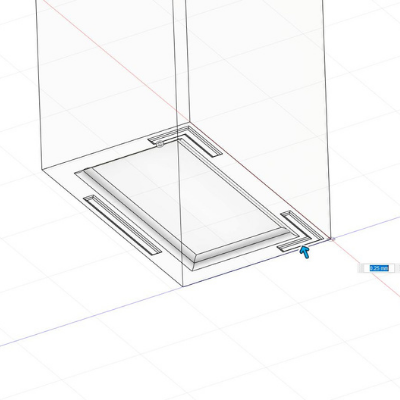
3. There is a a rectangular indent at the bottom of the bottle (probably for design purposes). I sketched it out and extruded it. Note: the extrusion is a "Cut," not a "New Body," because it is cutting into the main body.
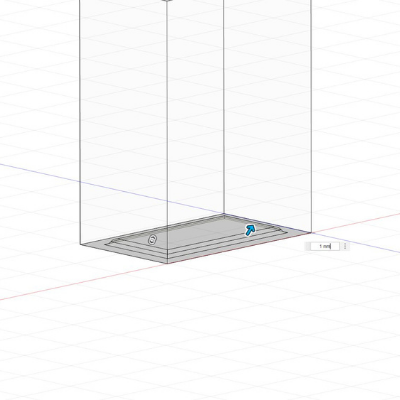
4. Then, I did fillets on the inner and outer edge of the extrusion cut I just made, as it is smooth in real life. I made a rough estimate for the fillet radius.
5. I also added 3 "feet" to the bottom of the container. I first made the sketch, then extruded outwards, and lastly fillet them.
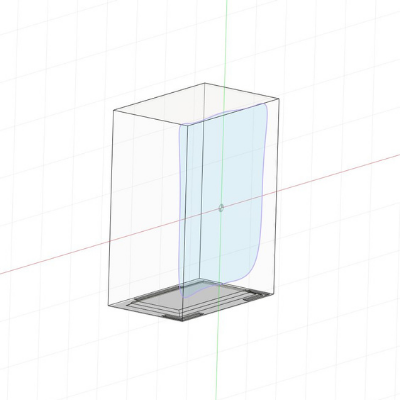
6. The inside hole is not a perfect rectanglular prism. So, I made a rough sketch using the spline tool on a plane that was offset to about 3mm from one side.
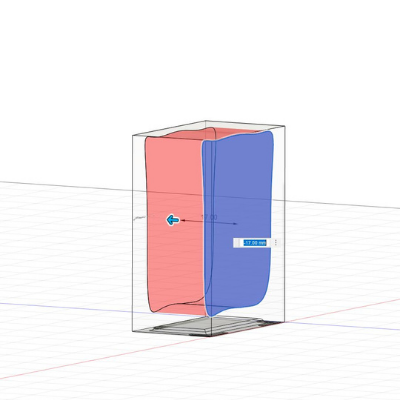
7. I extruded the inside hole sketch, making sure it's on the "Cut" mode. One caveat to making the hole using this method is that it isn't entirely accurate. The length of the extrustion is not flat in real life.
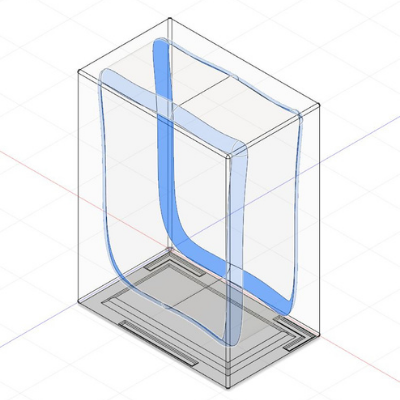
8. To finish off the inner area, I fillet both edges to mimick the smooth interior of the real bottle.
9. I fillet the outer body edges. This can be done at any step. I chose to do it now because I was also doing fillets on the interior.
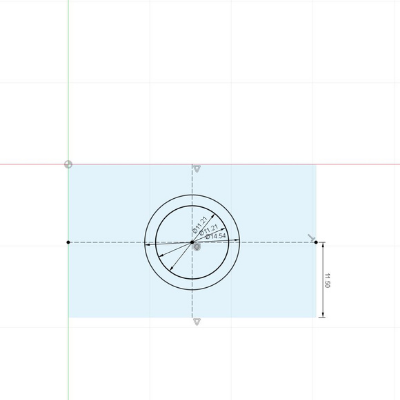
10. For the hole on the top, I used two circles to create the outer edge. The inner circle is for the opening.

11. I extruded the outer rim upwards and extruded the inner circle inwards, making sure that the inner extrusion went far enough to cut completely into the hole inside.
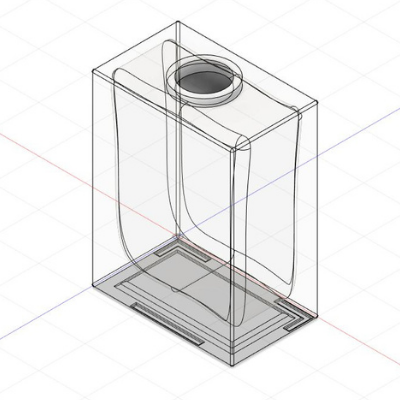
12. The last step is to change the material to glass (this can be done at any step). That's all there is to it. For the other components, I just created a "New Component" on the body design, so I can easily make the shapes accurate.
References
My prior experience with 3D modeling definitely helped with this assignment, even though I still had to watch numerous tutorials on YouTube about how to do certain things on Fusion 360. The YouTuber Lars Christensen was a great help as his videos are very comprehensive and get straight to the point. Some of the tutorials I watched are embeded below.
What I Learned
» How to use Fusion 360
» How to create rigid and moving joints
» Basic animations skills on Fusion 360
» How to make Fusion 360 part assemblies
» How to locally on Fusion 360
» Proper color sampling on Fusion 360
» Where to find embed share link for different resources
» How to use iframes on HTML